I was going through the Ruby on Rails documentation, digging into guides on asset compilation and routing, when I stumbled across an example that used the Unix command ls -la. I understood that ls lists files and directories, but didn't know what -la is. Rather than breaking my flow by alt-tabbing to a browser or hunting through Stack Overflow threads, I paused and thought, “Why can’t I just ask my terminal directly, without leaving my shell?”
That spark led to the core concept behind yo: transforming your command-line interface into a natural-language, interactive Q&A engine. Picture typing at your prompt:
In under a second, you receive a concise, actionable breakdown—no context switching, no juggling multiple tabs, no cognitive load from remembering various documentation URLs. You stay grounded in your terminal, focused on your code, and get the precise insight you need. This seamless, efficient user experience became my guiding vision for building yo.
Of course, turning this idea into reality demanded solving several technical puzzles: parsing both free-form and structured commands intelligently, streaming partial responses from AI backends in real time, ensuring robust error handling so network hiccups don’t hang the CLI, and packaging static binaries that install cleanly on macOS, Linux (glibc and musl), and beyond. With this lofty goal in mind, let’s dive into how each piece of the architecture comes together to power a truly conversational terminal.
However, creating such a tool involves tackling several technical challenges:
Flexible Command Parsing: Interpreting natural-style input like
yo what’s ls -la?versus structured commands likeyo ask "what’s ls -la?".
Asynchronous Streaming: Fetching partial responses from AI backends and displaying them in real time without blocking the terminal.
Error Handling: Mapping low-level network, serialization, and I/O errors into clear, user-friendly messages.
Cross-Platform Distribution: Packaging portable binaries for macOS, Linux (glibc and musl), and automating Homebrew formula updates.
Extensibility: Supporting multiple AI backends (OpenAI, Ollama, and future providers) through a clean abstraction.
In this blog we’ll cover each step with annotated code snippets, architectural rationale, and hands-on examples, expanding on my initial write-up to include more technical insights, edge-case handling, and real-world gotchas.
Motivation and Initial Design
At its core, yo addresses a common pain point: the friction of context switching between terminal, browser, and documentation when you need quick, precise answers. Key objectives:
Immediate Feedback: Stream AI-generated content as it arrives, similar to tailing a log file.
Scriptable Output: Offer both human-readable text and machine-friendly JSON for piping into other tools or CI scripts.
Extensible Architecture: A trait-based backend system allows plugging in new AI providers without rewriting core logic.
Zero Dependencies at Runtime: Statically linked binaries deliver by Cargo ensure users don’t need to fiddle with Python, Node, or other runtimes.
Architectural Overview
+----------------------+        +--------------------+
| Command Parsing      |        | Configuration      |
| (clap + subcommands) |<------>| (TOML file in      |
+----------------------+        |  ~/.config/yo/)    |
                                +--------------------+
       |                                 |
       v                                 |
+----------------------+                 |
| Command Dispatcher   |                 |
+----------------------+                 |
       |                                 |
       v                                 v
+-----------------------+        +--------------------+
| Backend Abstraction   |<------>| History Management |
| (OpenAI, Ollama, ...) |        | (append to log)    |
+-----------------------+        +--------------------+
       |
       v
+----------------------+        +---------------------+
| Async Networking     |        | Output Formatting   |
| (reqwest + tokio)    |------->| (text / JSON /      |
+----------------------+        |  prettytable)       |
                                 +--------------------+
The diagram above shows how each component interacts: parsed commands instruct the dispatcher, which reads config, invokes a backend, streams output, records history, and finally formats results for the user or scripts.
Project Setup
Start by cloning the repository and exploring the core files:
$ git clone https://github.com/Montekkundan/yo.git
$ cd yo
$ tree -L 2
#
# ├── src
# │   ├── main.rs        # Entrypoint, parses args, dispatches commands
# │   ├── cli.rs         # Clap struct definitions for CLI arguments
# │   ├── commands.rs    # Logic for each command (ask, setup, list, etc.)
# │   ├── config.rs      # Configuration loading/saving (TOML)
# │   └── lib.rs         # (Potentially library code, if used)
# ├── tests
# │   └── command_tests.rs # Integration-style tests for commands
# ├── Formula
# │   └── yo-bin.rb      # Homebrew formula
# └── .github
#     └── workflows
#         ├── release.yml
#         └── update-homebrew-formula.yml
Inspect Cargo.toml, which wires up dependencies:
[package]
name = "yo"
version = "1.1.0" # Note: Version might differ
edition = "2021"
authors = ["Montek Kundan <montekkundan@gmail.com>"]
license = "MIT"
description = "Ask your terminal anything using AI (OpenAI or Ollama)."
readme = "README.md"
homepage = "https://github.com/montekkundan/yo"
repository = "https://github.com/montekkundan/yo"
keywords = ["ai", "cli", "openai", "ollama", "chatgpt"]
categories = ["command-line-utilities"]

exclude = [...]

[dependencies]
clap = { version = "4.5.37", features = ["derive"] } # Argument parsing
directories = "6.0.0" # Cross-platform config dirs
dirs = "6.0.0" # Alternative for config dirs
futures-util = "0.3.31" # Async stream utilities
prettytable = "0.10.0" # Formatted table output (for 'list')
reqwest = { version = "0.12.15", features = ["json", "stream"] } # HTTP client
serde = { version = "1.0.219", features = ["derive"] } # Serialization/Deserialization
serde_json = "1.0.140" # JSON handling
serial_test = "3.2.0" # Ensure tests run serially (useful for config file tests)
tokio = { version = "1.44.2", features = ["full"] } # Async runtime
toml = "0.8.20" # TOML parsing (for config)
openssl = "0.10" # Native TLS backend (vendored for easier builds)
async-trait = "0.1.88" # Async functions in traits
anyhow = "1.0.98" # Flexible error handling

# Vendored OpenSSL for easier cross-compilation (macOS, musl)
[target.'cfg(target_env = "musl")'.dependencies]
openssl = { version = "0.10", features = ["vendored"] }

[target.'cfg(target_os = "macos")'.dependencies]
openssl = { version = "0.10", features = ["vendored"] }

[dev-dependencies]
dotenv = "0.15.0" # Load .env files for tests
tokio = { version = "1.44.2", features = ["full", "test-util"] }clap: Declarative parsing with derive macros (v4.5.37).directories/dirs: Cross-platform config and data directories.reqwest: Async HTTP client with JSON and streaming support.tokio: The async runtime powering network calls and concurrency.serde/serde_json/toml: Handling configuration and API responses.async-trait: Enables async functions within ourAIProvidertrait.anyhow: Simplifies error handling across different error types.prettytable: Used for thelistcommand output.openssl(vendored): Provides TLS support, vendored to simplify builds on macOS and musl Linux, avoiding system dependency issues.
Parsing Commands with Clap
Alright, so you want to talk to your terminal naturally, right? But how does the computer know if you're asking a question or giving a specific command like setup? That's where clap comes in ( this rust tutorial also recommends using this). It's like the friendly bouncer for our CLI, figuring out what you meant to say and directing traffic accordingly. Let's see how I taught clap to understand both plain English questions and structured commands, making the whole experience feel smooth.
clap makes defining complex CLI interfaces straightforward. In src/cli.rs, I define the main structure and subcommands:
1// src/cli.rs
2use clap::{Parser, Subcommand};
3
4#[derive(Parser)]
5#[command(name = "yo", about = "ask your terminal anything", version)]
6pub struct Cli {
7    #[command(subcommand)]
8    pub command: Option<Command>,
9
10    #[arg(trailing_var_arg = true, allow_hyphen_values = true)]
11    pub question: Vec<String>,
12}
13
14#[derive(Subcommand)]
15pub enum Command {
16    #[command(about = "Ask your AI a question",
17        long_about = "Ask the currently configured AI model a question...",
18        visible_alias = "a")]
19    Ask {
20        #[arg(required = true, help = "The question or prompt to send to the AI")]
21        question: Vec<String>,
22    },
23
24    #[command(about = "Setup your AI configuration", ...)]
25    Setup,
26
27    #[command(about = "Show config file path", ...)]
28    Config,
29
30    #[command(about = "Switch AI backend", ...)]
31    Switch {
32        #[arg(help = "Backend to switch to: 'openai' or 'ollama'")]
33        model: String,
34    },
35
36    #[command(about = "Set specific GPT model", ...)]
37    Gpt {
38        #[arg(help = "OpenAI model name to use (e.g. 'gpt-4', 'gpt-3.5-turbo')")]
39        model: String,
40    },
41
42    #[command(about = "List available AI models", ...)]
43    List,
44
45    #[command(about = "Show current AI model in use", ...)]
46    Current,
47
48    #[command(about = "Clear the conversation history", ...)]
49    ClearHistory,
50
51    // Catch-all for plain questions like `yo what is ls?`
52    #[command(external_subcommand)]
53    Other(Vec<String>),
54}Key features:
#[derive(Parser)]: Automatically generates parsing logic.#[command(subcommand)]: Defines distinct actions likeask,setup,list.Trailing Varargs
question: Vec<String>): Captures the question when no subcommand is given (e.g.,yo what is rust?).external_subcommand: Handles the case where the user typesyo <question>directly, treating<question>as an external command (which we then interpret as a question).
In src/main.rs, I parse arguments and dispatch to the appropriate function in src/commands.rs:
1// src/main.rs (simplified)
2use clap::Parser;
3use yo::cli::{Cli, Command};
4use yo::commands;
5
6#[tokio::main]
7async fn main() {
8    let cli = Cli::parse();
9
10    match cli.command {
11        Some(Command::Ask { question }) => commands::ask(&question).await,
12        Some(Command::Setup) => commands::setup(),
13        Some(Command::Config) => commands::show_config_path(),
14        Some(Command::Switch { model }) => commands::switch(&model).await,
15        Some(Command::Gpt { model }) => commands::set_gpt(&model).await,
16        Some(Command::List) => commands::list_models().await,
17        Some(Command::Current) => commands::show_current(),
18        Some(Command::ClearHistory) => commands::clear_history(),
19        Some(Command::Other(args)) => commands::ask(&args).await, // Treat 'Other' as 'ask'
20        None => {
21            // If only `yo` is run, or `yo <question>`
22            if !cli.question.is_empty() {
23                commands::ask(&cli.question).await;
24            } else {
25                // Show help if just `yo` is run
26                // although i just print "yo what?" you can do this instead.
27                Cli::parse_from(&["yo", "--help"]);
28            }
29        }
30    }
31}Async Networking and Streaming
Waiting for a computer to finish thinking is boring. Especially when you're in the zone! I wanted yo to feel like a conversation, not a loading bar. This section dives into the magic of async/await and reqwest that lets yo fetch answers from the AI piece by piece, showing you the response as it comes in, live. It's all about keeping things snappy and interactive.
When you call an API, the program can hang waiting for a response. To avoid that, I used reqwest with Rust’s async/await. So while the server thinks, my CLI stays responsive, giving you instant feedback.
Here's the core streaming logic for OpenAI in src/commands.rs:
1// src/commands.rs (inside OpenAIProvider::ask)
2use futures_util::StreamExt;
3use std::io::Write;
4
5// ... setup client and request body ...
6let body = serde_json::json!({
7    "model": self.model,
8    "messages": messages,
9    "stream": true // Enable streaming
10});
11
12let res = client
13    .post("https://api.openai.com/v1/chat/completions")
14    .bearer_auth(&self.api_key)
15    .json(&body)
16    .send()
17    .await?;
18
19let status = res.status();
20let mut full = String::new();
21if !status.is_success() {
22    let err_text = res.text().await.unwrap_or_default();
23    eprintln!("OpenAI API error: {}\n{}", status, err_text);
24    return Ok(String::new()); // Return empty on error
25}
26
27let mut stream = res.bytes_stream();
28let mut got_content = false;
29
30while let Some(chunk_result) = stream.next().await {
31    let chunk = chunk_result?;
32    // OpenAI streaming uses Server-Sent Events (SSE)
33    for line in chunk.split(|&b| b == b'\n') {
34        if line.starts_with(b"data: ") {
35            let json_str = &line[6..]; // Skip "data: "
36            if json_str == b"[DONE]" {
37                continue; // End of stream marker
38            }
39            match serde_json::from_slice::<serde_json::Value>(json_str) {
40                Ok(val) => {
41                    if let Some(content) = val["choices"][0]["delta"]["content"].as_str() {
42                        print!("{}", content); // Print chunk immediately
43                        std::io::stdout().flush().ok(); // Ensure it appears
44                        full.push_str(content);
45                        got_content = true;
46                    }
47                }
48                Err(e) => {
49                    // Handle potential JSON parsing errors for incomplete chunks
50                    eprintln!("\nError parsing stream chunk: {}", e);
51                }
52            }
53        } else if !line.is_empty() {
54             // Log other lines for debugging
55             eprintln!("OpenAI stream info: {}", String::from_utf8_lossy(line));
56        }
57    }
58}
59
60if !got_content {
61    eprintln!("No response content received from OpenAI. Check API key/model/network.");
62}
63println!(); // Final newline after streaming
64Ok(full) // Return the full concatenated responseKey points:
"stream": truetells OpenAI to send Server-Sent Events (SSE).res.bytes_stream()provides an async stream of byte chunks.We iterate through the stream using
while let Some(...) = stream.next().await.Each chunk might contain multiple SSE
data:lines, so I split by newline.We parse the JSON payload after
data:to extract thecontentdelta.print!andstdout().flush()ensure immediate display.Error handling checks the initial HTTP status and parses JSON carefully.
For Ollama, the approach is different. Since ollama run streams to stdout natively, I spawn the process and let it inherit the terminal's standard output/input:
1// src/commands.rs (inside OllamaProvider::ask)
2use std::process::Command;
3
4let status = Command::new("ollama")
5    .arg("run")
6    .arg(&self.model)
7    .arg(prompt)
8    .status()?;
9Ok(format!("Ollama exited with status: {}", status))This provides the most native Ollama experience directly within the user's terminal.
Error Handling with Anyhow
Let's be real, things break. Networks glitch, APIs change, config files get messed up. Instead of letting the whole app crash and burn with some cryptic message, we needed a way to handle errors gracefully. Enter anyhow. It's our safety net, catching problems and letting us give you a clear heads-up about what went wrong, without cluttering the code with endless error checks. Simple, clean, and keeps things running smoothly (mostly!).
Instead of defining custom error types with thiserror, yo uses anyhow::Result for simplicity. anyhow allows easily converting various error types (like reqwest::Error, io::Error, serde_json::Error) into a single, printable error type using the ? operator.
1// Example using anyhow's ? operator
2async fn fetch_data() -> anyhow::Result<String> {
3    let response = reqwest::get("...").await?; // reqwest::Error -> anyhow::Error
4    let data: serde_json::Value = response.json().await?; // reqwest::Error -> anyhow::Error
5    let text = data["field"].as_str().ok_or_else(|| anyhow::anyhow!("Missing field"))?.to_string(); // Option -> anyhow::Error
6    Ok(text)
7}In main.rs, errors bubble up and can be printed concisely:
1// Simplified error handling in main or command functions
2match provider.ask(&prompt).await {
3    Ok(response) => {
4        // ... print response ...
5    }
6    Err(e) => {
7        // anyhow automatically includes the chain of errors
8        eprintln!("Error: {:?}", e);
9    }
10}This keeps error handling lightweight while still providing context when things go wrong.
Output Formatting
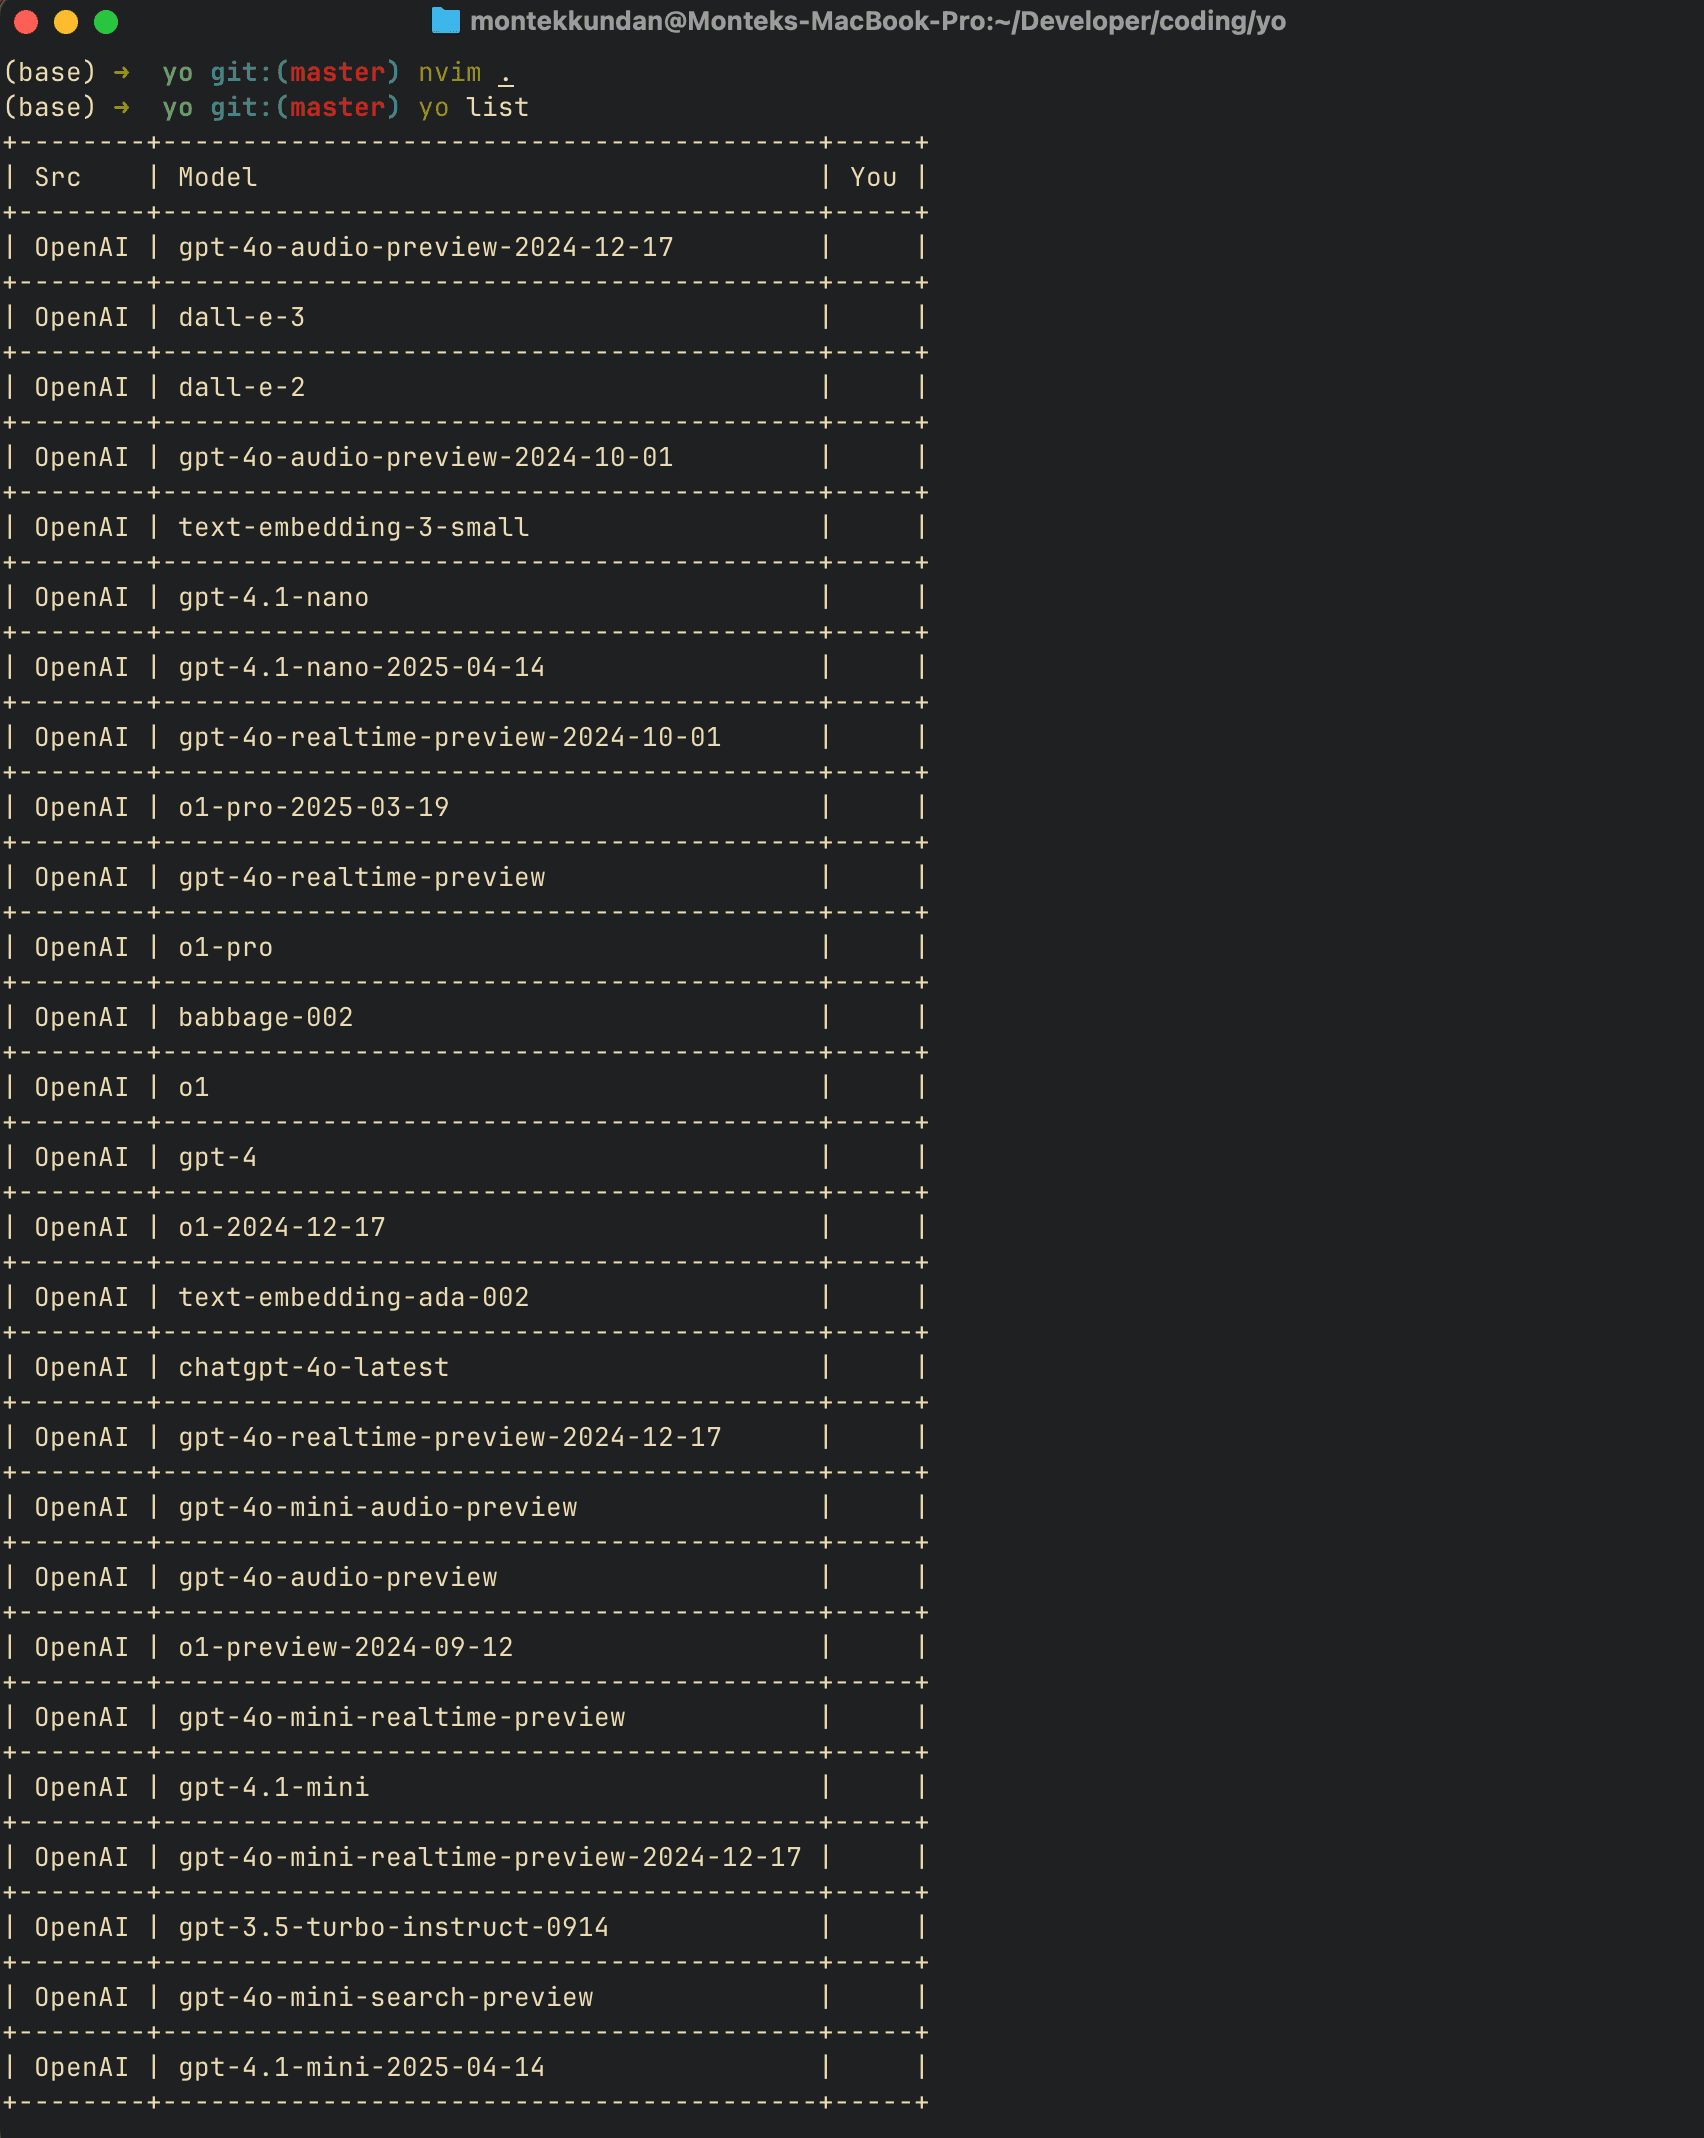
Getting the answer is one thing, but making it look good is another! Sometimes you just want the text, but other times, like when listing available AI models, a neat table is way easier to read. This part shows how I use prettytable to organize the yo list command to see the information clearly, making sure the output isn't just correct, but also easy on the eyes.
While the primary output is streamed text, yo uses prettytable for structured only in the output of the list command (for now):
1// src/commands.rs (inside list_models)
2use prettytable::{Table, Row, Cell};
3
4let mut table = Table::new();
5table.add_row(Row::new(vec![Cell::new("Src"), Cell::new("Model"), Cell::new("You")]));
6
7// ... fetch models ...
8
9for m in fetch_openai_models(key).await {
10    let you = if cfg.source=="openai" && cfg.model==m { "✔" } else { "" };
11    table.add_row(Row::new(vec![Cell::new("OpenAI"), Cell::new(&m), Cell::new(you)]));
12}
13// ... similar loop for Ollama ...
14
15table.printstd(); // Print the formatted table to stdoutThis provides a clean, readable list of available models and indicates the currently selected one.
Automated Testing
Writing code is fun, but how do we make sure it actually works and stays working? Especially when dealing with external APIs and config files that love to change. This section pulls back the curtain on our testing strategy. We'll see how I use tokio::test and some clever environment setup to check everything from command parsing to live API calls, giving us confidence that yo won't fall apart unexpectedly.
Testing a CLI that interacts with external APIs and configuration files requires careful setup. yo uses integration-style tests located in tests/command_tests.rs.
Key aspects:
#[tokio::test]: Marks async test functions.serial_test::serial: Ensures tests that modify the environment (like config files) run one after another to avoid interference.Test Environment Setup: A
TestEnvstruct temporarily overrides the config directoryXDG_CONFIG_HOME) and creates a default config file for testing purposes. It cleans up afterwards usingDrop.Conditional External API Tests: Tests hitting live OpenAI/Ollama APIs are guarded by an environment variable
ENABLE_EXTERNAL_API_TESTS=true) and checks for API key presence or Ollama availability, preventing failures in CI or environments without credentials.
1// tests/command_tests.rs (simplified structure)
2use yo::commands;
3use serial_test::serial;
4use std::{env, fs};
5use tempfile::tempdir;
6
7// Helper to manage temporary config directory
8struct TestEnv { /* ... */ }
9impl TestEnv {
10    fn new() -> Self {
11        // Set XDG_CONFIG_HOME to temp dir
12        // Write default config.toml
13        // ... setup ...
14        TestEnv { /* ... */ }
15    }
16}
17impl Drop for TestEnv {
18    fn drop(&mut self) {
19        // Restore original XDG_CONFIG_HOME
20        // Remove temp dir
21        // ... cleanup ...
22    }
23}
24
25// Helper to check if external tests should run
26fn should_run_external_api_tests() -> bool {
27    env::var("ENABLE_EXTERNAL_API_TESTS").map_or(false, |v| v == "true") &&
28    env::var("OPENAI_API_KEY").is_ok()
29}
30
31#[tokio::test]
32#[serial] // Run serially due to config changes
33async fn test_switch_command() {
34    let _env = TestEnv::new(); // Setup temp config
35    commands::switch("ollama").await;
36    // Assert config file was updated correctly (read temp config file)
37    // ... assertions ...
38}
39
40#[tokio::test]
41#[serial]
42async fn test_ask_openai() {
43    if !should_run_external_api_tests() {
44        println!("Skipping external OpenAI test");
45        return;
46    }
47    let _env = TestEnv::new();
48    // This will print the streamed output to the test console
49    commands::ask(&["Ping".into()]).await;
50    // Basic assertion: check if it completed without error
51}
52
53// ... other tests for setup, list, current, etc. ...This approach tests the command logic directly by calling the functions from src/commands.rs, verifying configuration changes, and optionally hitting live APIs under controlled conditions.
Configuration and History
Nobody wants to type their API key every single time! yo needed a way to remember your preferences, like which AI backend you prefer (OpenAI or Ollama?) and your keys. We'll look at how yo uses a simple TOML file tucked away in your config directory to store these settings. Plus, we added a basic history feature, so you can see past conversations (and clear them out if needed).
Configuration is stored in ~/.config/yo/config.toml (path determined by directories). src/config.rs handles loading, saving, and default values:
1// src/config.rs (simplified)
2use serde::{Serialize, Deserialize};
3use std::{fs, path::PathBuf};
4use directories::ProjectDirs;
5
6#[derive(Serialize, Deserialize, Debug, Clone)]
7pub struct Config {
8    pub source: String, // "openai" or "ollama"
9    pub model: String,
10    pub openai_api_key: Option<String>,
11}
12
13pub fn get_config_path() -> PathBuf { /* ... finds ~/.config/yo/config.toml ... */ }
14
15pub fn load_or_create_config() -> Config {
16    let path = get_config_path();
17    if path.exists() {
18        let content = fs::read_to_string(&path).unwrap_or_default();
19        toml::from_str(&content).unwrap_or_else(|_| default_config()) // Fallback to default
20    } else {
21        default_config()
22    }
23}
24
25pub fn save_config(config: &Config) {
26    let path = get_config_path();
27    fs::create_dir_all(path.parent().unwrap()).ok();
28    let content = toml::to_string_pretty(config).unwrap();
29    fs::write(path, content).ok();
30}
31
32fn default_config() -> Config { /* ... provides defaults ... */ }
33
34// History is appended to ~/.config/yo/history.txt
35pub fn append_history(entry: &str) { /* ... appends line to history file ... */ }
36
37pub fn clear_history() { /* ... clears history file ... */ }The setup command guides the user through initial configuration, while switch and gpt modify the active backend and model. History is simply appended to a text file, and clear-history removes it.
Cross-Platform Builds and Distribution
Okay, so I built this cool tool, but how do I get it onto your machine, whether you're on a Mac, a Linux box, or something else? And how do I make sure it just works without needing a bunch of extra installs? This final technical piece covers the nitty-gritty of compiling yo into standalone binaries using GitHub Actions, dealing with tricky things like TLS, and even automating updates for Homebrew users. It's all about making installation painless.
Building static binaries that work across different systems is crucial for a CLI tool. Key challenges:
TLS Backend: Network libraries like
reqwestneed a TLS implementation. Whilerustlsis a pure Rust option,youses theopensslcrate with thevendoredfeature enabled for macOS and musl targetsCargo.toml). This bundles the necessary OpenSSL libraries into the binary, avoiding runtime dependencies on the target system's OpenSSL version, which can often cause linking issues, especially on older Linux distributions or macOS.musl Target: For truly static Linux binaries without glibc dependency, I build using the
x86_64-unknown-linux-musltarget. This requires a musl-compatible toolchainmusl-gcc) and the vendored OpenSSL.GitHub Actions for Releases: The
.github/workflows/release.ymlworkflow automates this:Checks out code.
Installs Rust and necessary build targets
x86_64-unknown-linux-musl,x86_64-apple-darwin, etc.).Installs
musl-toolson the Linux runner.Builds release binaries for each target
cargo build --release --target ...).Packages binaries into
.tar.gzarchives.Creates a GitHub Release and uploads the archives as assets.
1# .github/workflows/release.yml (simplified)
2name: Release
3
4on:
5  push:
6    tags:
7      - 'v*'
8
9jobs:
10  build_release:
11    runs-on: ${{ matrix.os }}
12    strategy:
13      matrix:
14        include:
15          - os: ubuntu-latest
16            target: x86_64-unknown-linux-musl
17            archive_name: yo-${{ github.ref_name }}-x86_64-unknown-linux-musl.tar.gz
18          - os: macos-latest
19            target: x86_64-apple-darwin
20            archive_name: yo-${{ github.ref_name }}-x86_64-apple-darwin.tar.gz
21          # Add Windows, ARM targets if needed ( i got stuck here )
22
23    steps:
24    - uses: actions/checkout@v4
25    - name: Install Rust
26      uses: dtolnay/rust-toolchain@stable
27      with:
28        targets: ${{ matrix.target }}
29
30    - name: Install musl-tools (Linux)
31      if: contains(matrix.target, 'musl')
32      run: sudo apt-get update && sudo apt-get install -y musl-tools
33
34    - name: Build binary
35      run: cargo build --release --target ${{ matrix.target }}
36
37    - name: Package binary
38      shell: bash
39      run: |
40        cd target/${{ matrix.target }}/release
41        strip yo || true # Reduce size, ignore errors if strip fails
42        tar czvf ../../../${{ matrix.archive_name }} yo README.md LICENSE # Include essential files
43        cd ../../..
44
45    - name: Upload Release Asset
46      uses: actions/upload-release-asset@v1
47      env:
48        GITHUB_TOKEN: ${{ secrets.GITHUB_TOKEN }}
49      with:
50        upload_url: ${{ needs.create_release.outputs.upload_url }}
51        asset_path: ./${{ matrix.archive_name }}
52        asset_name: ${{ matrix.archive_name }}
53        asset_content_type: application/gzip
54
55  # Job to create the GitHub release itself (needed for upload_url)
56  create_release:
57    runs-on: ubuntu-latest
58    outputs:
59      upload_url: ${{ steps.create_release.outputs.upload_url }}
60    steps:
61      - name: Create Release
62        id: create_release
63        uses: actions/create-release@v1
64        env:
65          GITHUB_TOKEN: ${{ secrets.GITHUB_TOKEN }}
66        with:
67          tag_name: ${{ github.ref }}
68          release_name: Release ${{ github.ref }}
69          draft: false
70 prerelease: falseHomebrew Formula Automation: A separate workflow
.github/workflows/update-homebrew-formula.yml) triggers after a successful release. It checks out thehomebrew-yotap repository, updates theFormula/yo-bin.rbfile with the new version and SHA256 checksums for the release assets, and commits the change back to the tap repository. This ensures Homebrew users can install the latest version quickly.
1# .github/workflows/update-homebrew-formula.yml (conceptual)
2name: Update Homebrew Formula
3
4on:
5  release:
6    types: [published]
7
8jobs:
9  update_formula:
10    runs-on: ubuntu-latest
11    steps:
12    - name: Checkout Homebrew Tap Repo
13      uses: actions/checkout@v4
14      with:
15        repository: Montekkundan/homebrew-yo
16        token: ${{ secrets.TAP_REPO_TOKEN }} # Needs a PAT with repo write access
17
18    - name: Download SHA256 checksums
19      # Fetch checksums from release assets or a checksum file
20      run: |
21        # ... script to get sha256 for macos and linux tar.gz ...
22        echo "MAC_SHA=$(...)" >> $GITHUB_ENV
23        echo "LINUX_SHA=$(...)" >> $GITHUB_ENV
24
25    - name: Update Formula File
26      run: |
27        VERSION="${{ github.event.release.tag_name }}"
28        # Use sed or similar to update version and sha256 in Formula/yo-bin.rb
29        sed -i "s/version '.*/version '$VERSION'/" Formula/yo-bin.rb
30        sed -i "s|url \"https://github.com/Montekkundan/yo/releases/download/.*/yo-.*-x86_64-apple-darwin.tar.gz\"|url \"https://github.com/Montekkundan/yo/releases/download/$VERSION/yo-$VERSION-x86_64-apple-darwin.tar.gz\"|" Formula/yo-bin.rb
31        sed -i "s/sha256 \"[a-f0-9]*\" # macOS/sha256 \"${{ env.MAC_SHA }}\" # macOS/" Formula/yo-bin.rb
32        # ... similar sed commands for Linux url and sha256 ...
33
34    - name: Commit and Push Changes
35      run: |
36        git config --global user.name 'github-actions[bot]'
37        git config --global user.email 'github-actions[bot]@users.noreply.github.com'
38        git add Formula/yo-bin.rb
39        git commit -m "Update yo formula to ${{ github.event.release.tag_name }}"
40 git pushLessons Learned and Future Work
Building yo reinforced several key lessons:
clapis Powerful: Its derive macros and features likeexternal_subcommandhandle complex CLI patterns elegantly.Async Rust is Mature:
tokioandreqwestmake async network I/O manageable, especially for streaming.Error Handling Trade-offs:
anyhowoffers simplicity, but for library-like code,thiserrormight provide more structured error types.Cross-Compilation Needs Care: Vendoring TLS
openssl) significantly simplifies distribution, especially formusltargets.Testing CLIs is Tricky: Mocking external APIs or managing test environments requires careful setup (using temp dirs, serial tests, environment variables).
Future improvements that I could include:
More Backends: Adding Anthropic Claude, Gemini, or other local LLM interfaces.
Contextual History: Using previous Q&A pairs to inform new requests.
File Input: Allowing
yoto analyze or answer questions about local filesyo summarize report.txt).Shell Integration: Providing shell functions
yocomplete) for better tab completion.Refined Streaming: Handling markdown or code blocks better during streaming output.
Windows Support: I could have a
xmlscript forscoopto installyowith command likescoop install yo
Conclusion
yo started as a simple idea to reduce friction in the terminal and evolved into a robust CLI application leveraging many powerful features of the Rust ecosystem. From async networking and streaming to declarative argument parsing and automated cross-platform releases, it demonstrates how Rust can be used to build efficient, reliable, and user-friendly command-line tools. The journey involved navigating choices around error handling, TLS backends, and testing strategies, ultimately resulting in a tool that hopefully makes developers' lives a little easier, one terminal query at a time.


